
Commercially printed multi-page documents can be bound in several ways. But by far, the most common are soft-cover Saddle-Stitching, squared spine Binding and hardback Case-binding. GSM takes a look…
Saddle-Stitching (Soft-Cover)
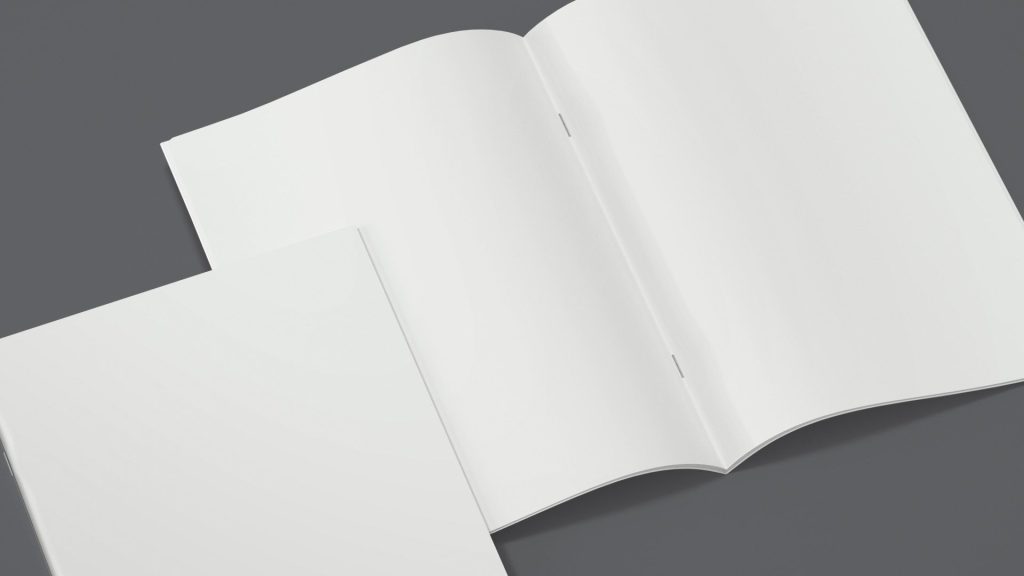
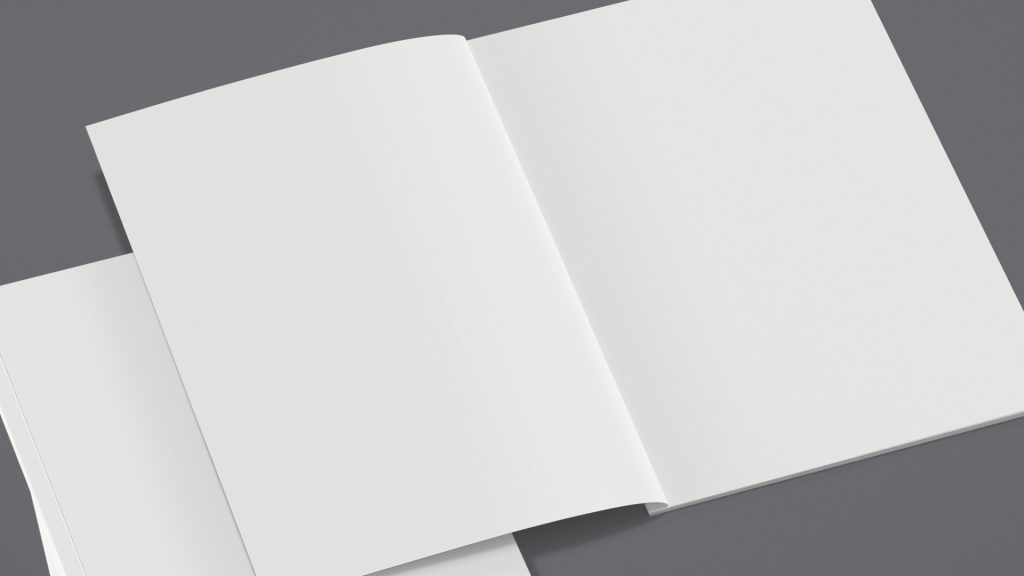
Saddle-stitching is the most common form of ‘soft-cover’ commercial binding. This process uses two or more staples inserted along the spine to hold the document together. Saddle-stitching is a machine process with little manual input, apart from the initial collating of the printed sheets, making this the most costeffective way to bind multi-page documents. As mentioned in our article “Folding” some digital print systems have saddle-stitching capabilities running off the printer, producing a finished booklet straight off the press.
For Sheet-fed offset lithographic printed documents—which encompasses most medium-to-large volume print runs—Saddle-stitching is a separate process undertaken after printing. Once dry, the printed running sheets are folded into ‘signatures’ and collated into the correct order. The collated signatures are then combined with a wraparound cover, and everything is stapled along the spine. Once bound, documents are trimmed to the correct size (trimming is always last).
Compared to the other binding methods, saddle-stitching is relatively costeffective and has the advantage of being able to lay flat when opened. The main drawback is that, as the staples must penetrate through the collated thickness of the spine, this method can only be used for binding documents up to (approximately) 72 pages. The spine thickness also causes page creep. Using thinner, lighter paper can facilitate more pages, but at the risk of show-through (meaning, the printed image shows through on the reverse side of the sheet)
Saddle-Stitching: Page Creep
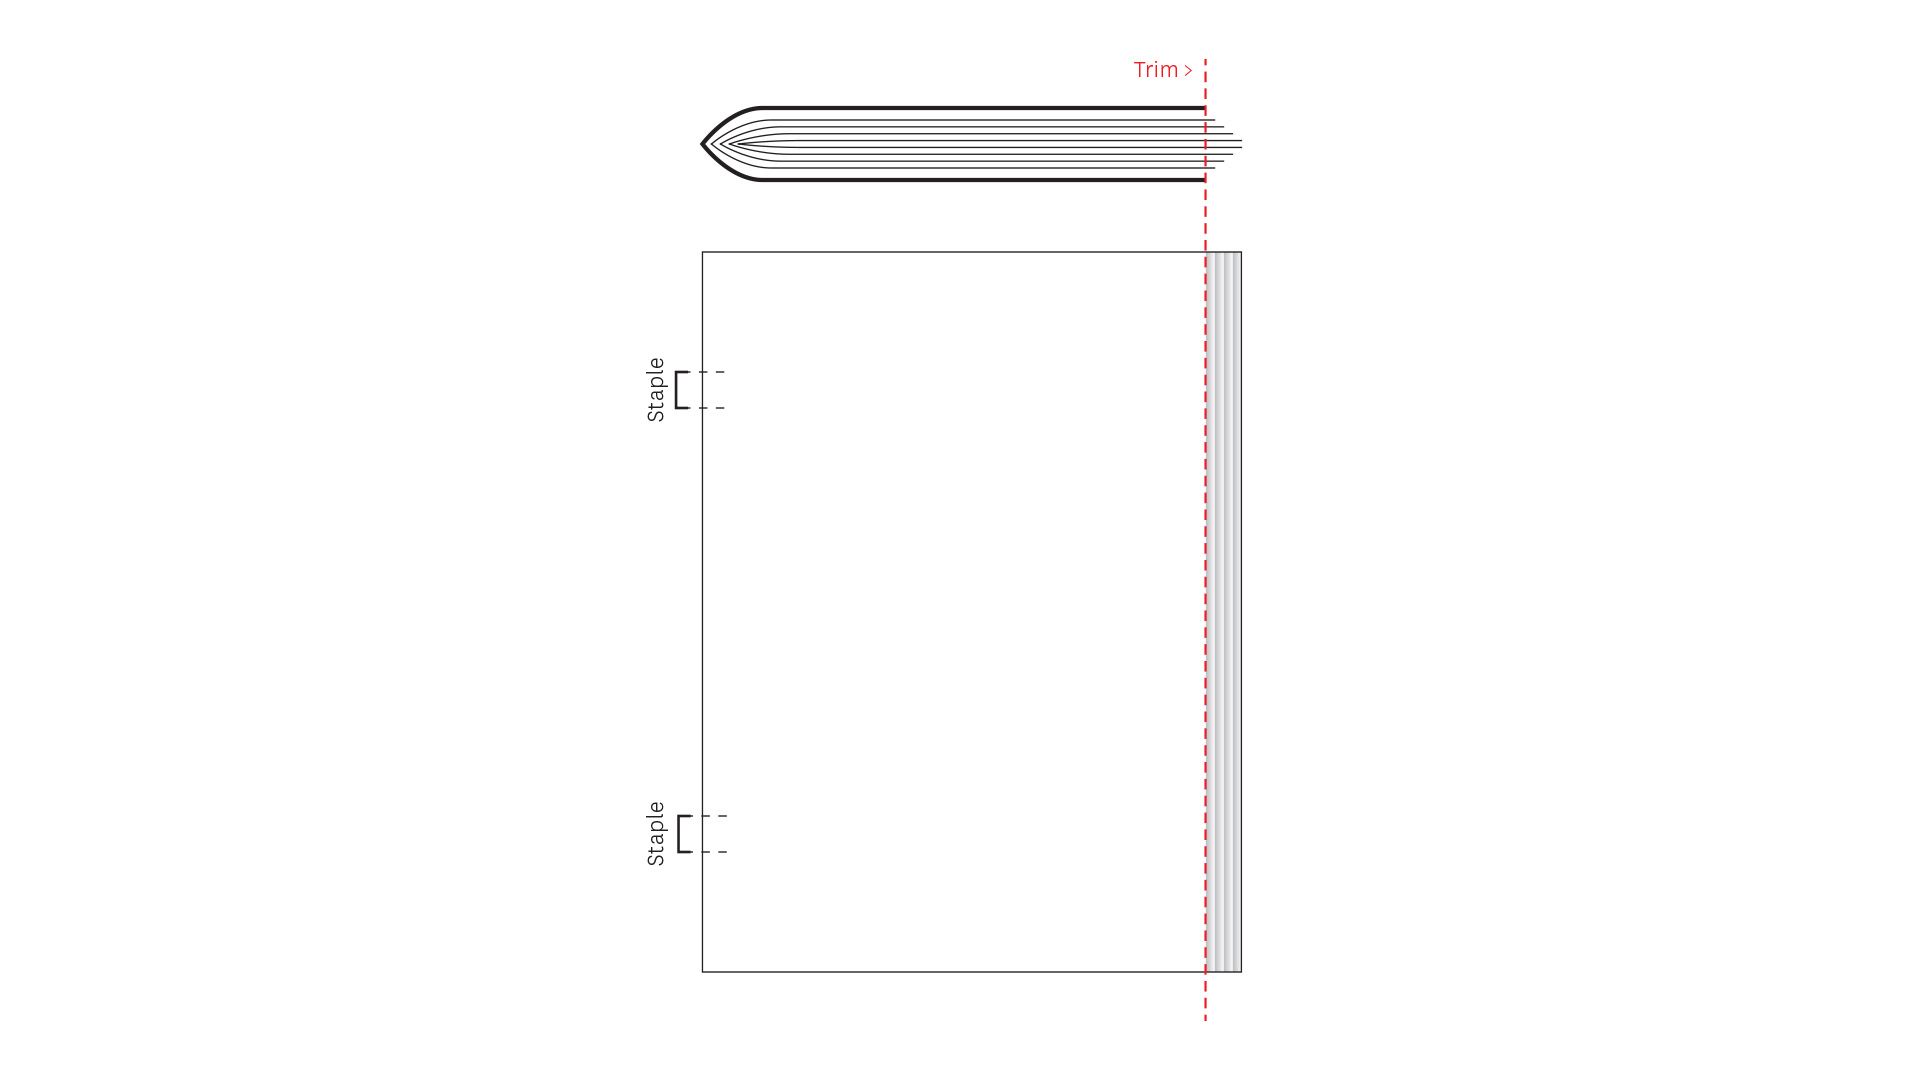 In saddle-stitched documents, the combined thickness of the folded signatures along the binding edge forces the inner middle pages outwards slightly—this is called ‘page creep’.
Page creep creates a particularly noticeable problem with repeating elements close to the page edge, such as page numbering or footers, as these push closer to the trim within the middle of the document.
To overcome this issue, during prepress—the prepress team will use ‘Shingling’, a slight incremental offset of each page that compensates for page creep. While you should expect the printer to do this, it can be worth raising this concern. When page creep goes wrong, it can go horribly wrong… Sometimes resulting in page numbers or footers being cut off!
Saddle-Stitching vs Squared Spine Soft-Cover Binding
Aside from aesthetics, when thinking about ‘soft-cover’ binding options—there are three main things to take into consideration:
- Budget: As saddle-stitching is a machine-process with little manual input, this method is significantly more cost-effective than square-spine methods.
- Number of pages: As a general rule of thumb:
- —Under 32 pages > use saddle-stitching
- —Over 72 pages > use Perfect, Burst or PUR Binding
- —Between 32–72 pages > any of the above.
- Opens Flat:
-
- —Saddle-stitching: yes.
- —Perfect & Burst Binding: no.
- —PUR Binding: better than Perfect or Burst Binding, but not as good as saddle-stitching.
-
Square-Spine Binding (Soft-Cover)
The main alternatives to saddle-stitching for binding soft-cover documents are Perfect, Burst or PUR Binding. These related but distinctly different methods achieve a similar looking ‘squared-spine’. It is important to note that these terms are often used interchangeably—but are, in fact, different methods. The difference is how the spine is prepared and the resulting strength of the bind.
Perfect Binding
 In Perfect Binding, the folded signatures of the internal pages are collated and trimmed along the binding edge—and then glued into the spine of a wraparound cover. In effect, a series of individual pages glued together along the spine.
Burst Binding
By comparison, in Burst binding, the folded signatures are not pre-trimmed. Instead, the signatures are notched along the spine edge creating a grip for the adhesive—and then glued into the spine of a wraparound cover. The result is a significantly stronger bind than Perfect Binding, but it requires more preparation time for the notching.
Typically, long-life/high-use documents, such as magazines or nonfiction soft cover books, use Burst Binding, whereas single use documents use Perfect Binding, as it is more cost effective.
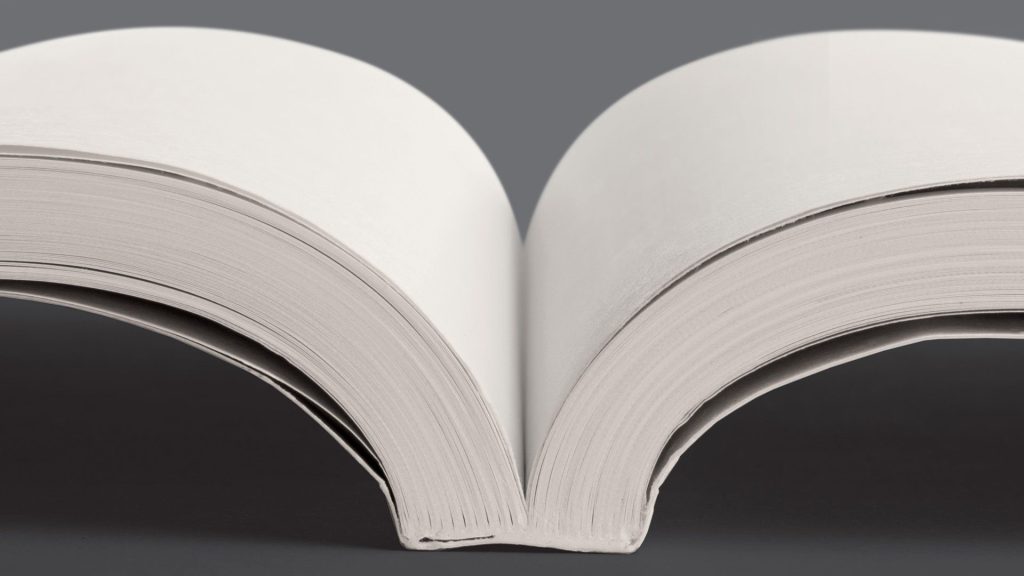
Note that Perfect or Burst bound documents can not open completely flat, as the binding is not flexible enough to allow this without the document pulling apart.
PUR Binding
PUR Binding (Polyurethane Reactive Binding) is a type of Perfect Binding which uses a special glue to significantly increase the binding strength to the point that PUR documents can open almost flat. The trade-off is—this involves more work than standard Perfect Binding and is subsequently less cost effective.
Regardless of the method used, documents are trimmed to the final size after binding is complete.
Using Burst/PUR methods, a large number of pages can be bound together, some PUR-bound documents can exceed 1000+ pages. As the binding strength is significantly less with Perfect Binding, this is more suited to documents with much lower page counts (typically 72 pages or less). Note, there is a minimum number of pages with any of these methods—(as a general rule of thumb) not less than 32 pages, or the spine does not shape correctly.
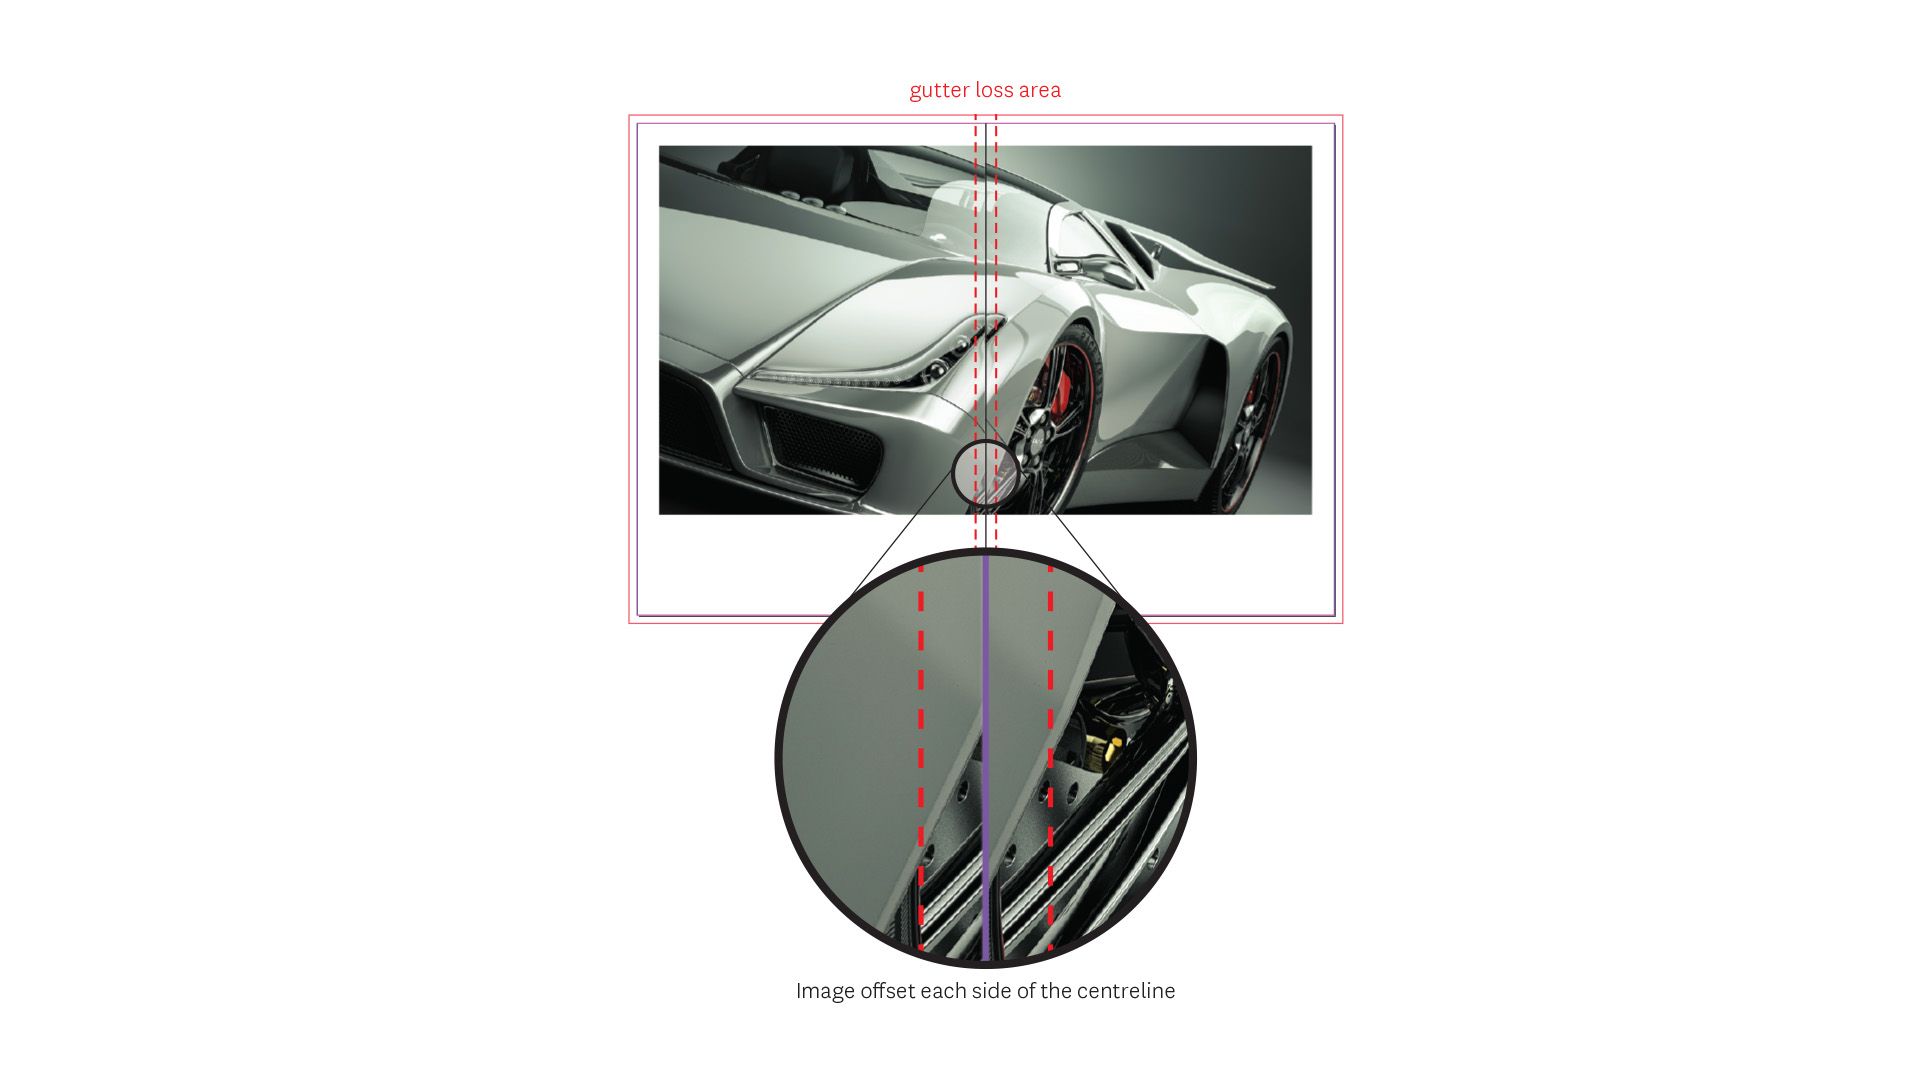
Gutter Loss
 Due to the rigidity of Perfect or Burst Binding, these documents cannot open flat to the same extent as PUR Binding or Saddle-stitched documents. This creates an unwanted side effect called ‘gutter loss’.
Gutter loss potentially affects all elements that run across spreads, particularly images, where the part of the image that runs across the spine becomes lost in the bind. This
usually equates to 3-5mm on each side of the spine on all internal pages and can result in strange-looking images where the transition across the gutter is not visually smooth.
The simplest workaround for avoiding this issue is ensuring nothing critical runs across the gutter. However, this is not always practical from a layout perspective.
An alternative workaround is to manually compensate for gutter loss. This is achieved by splitting any image running across the spread into halves— one half per page—and then offsetting these from the centre bind by 3-5mm. When the document is open, the image will visually transition smoothly across the bind.
Case-Binding (Hardback)
Case-binding is the method used for ‘hardback’ books. Unlike the previous ‘soft-back’ methods, which are done using machines, Case-binding is undertaken by a specialist bookbinder and involves a significant amount of manual labour. This extra work is reflected in the cost and is the primary reason why hardback books cost 30-50% more than their soft-cover equivalents.
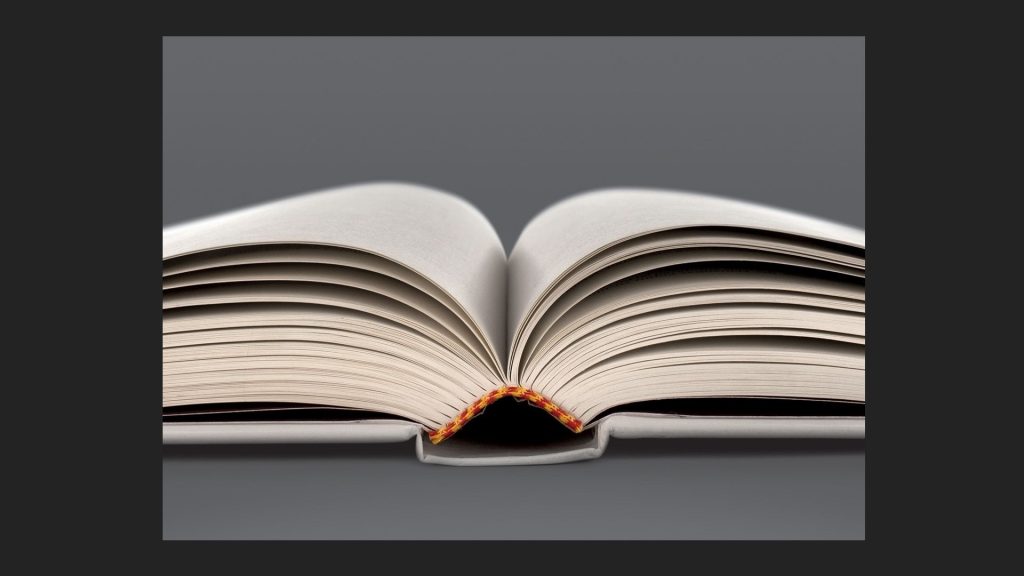
However, cost and aesthetics aside, there are some significant advantages to case-binding over soft-back methods. Firstly, hardbacks are significantly more durable than softbacks and have a higher perceived value (hence why most coffee table books are hardbacks). In addition, documents bound in this manner can be opened flat. This is also possible with saddle-stitched and, to a lesser extent, PUR-bound documents. But not with perfect or burst-bound documents. However, the process is significantly more involved and time-consuming.
 One important consideration when using Case-binding is—time. The internal pages are printed the same way as Burst-Binding but are sewn-stitched with cotton (and sometimes glued); covers are made by hand—a time-consuming process that needs to be factored into the overall planning.
From a design perspective, Case-binding requires extra thinking for the cover section. This is more complex than soft-cover binding methods. It comprises a cover-outer (which can be either printed paper or a book-binding material such as canvas), plus endpapers (which can be plain, printed or coloured heavyweight paper), and possibly a wraparound printed dust jacket. Canvas covers are generally unprinted but can feature print embellishments such as Hot Stamp Foiling. The creative options with Case-binding are limited only by budget and time constraints.
Bookbinding Process
Case-binding is the job of a specialist bookbinder. Most projects start with the document arriving from the printery to the bookbinders as printed, untrimmed folded signatures. If the document uses a printed cover, this will be supplied flat and untrimmed.
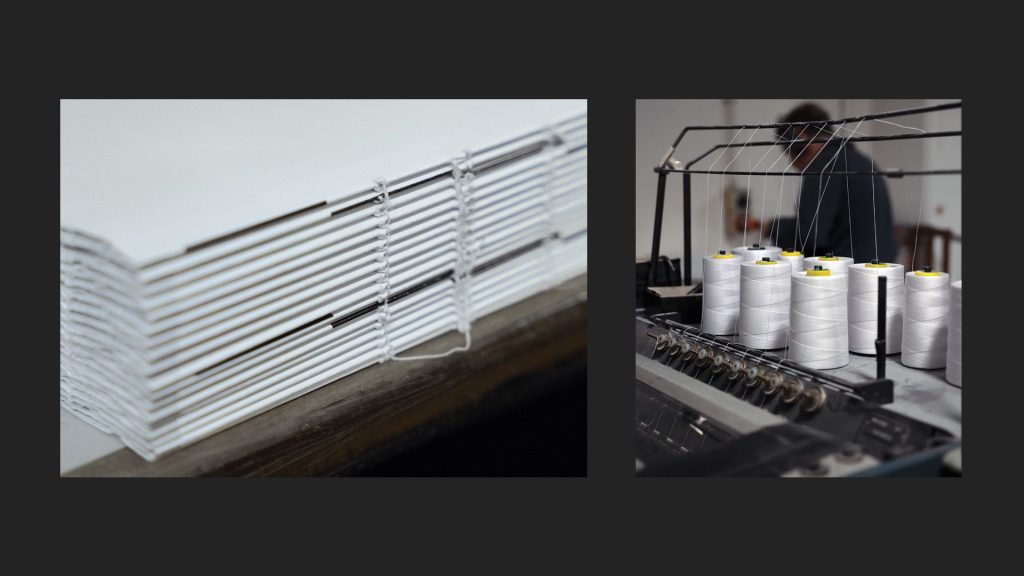 The Bookbinder collates and binds the internal pages together using cotton (1, 2). Endpapers are glued to the outside front and back of the bound internal pages. The finished internal section is then trimmed to the correct size.
 The cover section is made by hand, using thick card backing boards (3). One for the front and back cover—glued to the reverse of the cover outer (4). The edges of the cover outer are wrapped around the backing boards and glued down. Depending on the document’s thickness, a brace (usually bookbinding tape, card or plastic) is added to the spine to strengthen this. The constructed cover is run through a roller to remove any air bubbles between the backing boards and cover material.
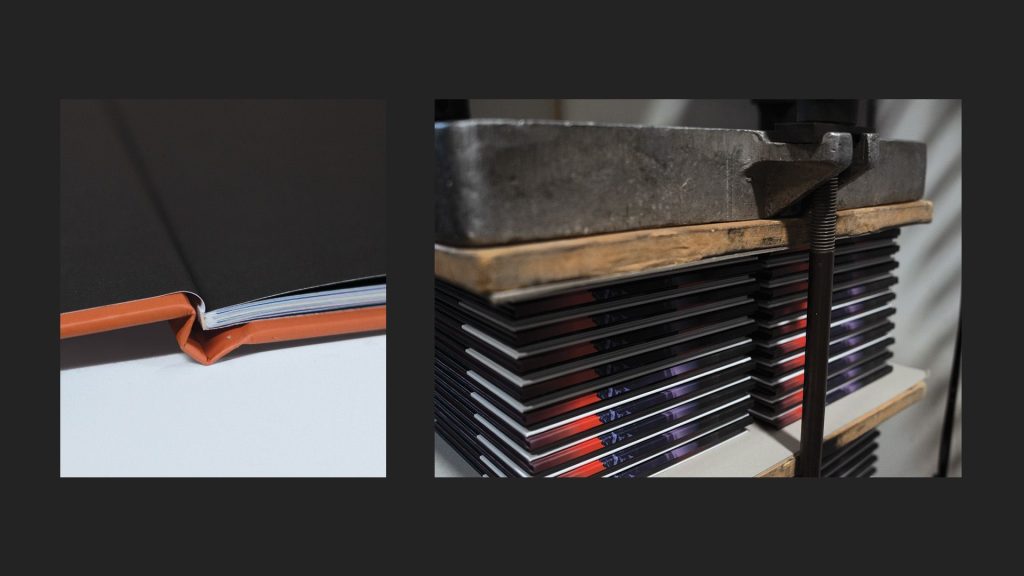 Once the cover is dry, the internal pages are glued in place using the endpapers (5), creating the final book. Note that in Case-binding, the spine is not glued directly to the internal pages. Once completed, the book is pressed to ensure a strong bond between the cover and
internal pages (6). Job done.
Trimming
Most print projects, bound or unbound, require trimming to the final size. Note that most multi-page documents are trimmed to the correct size after they are bound.
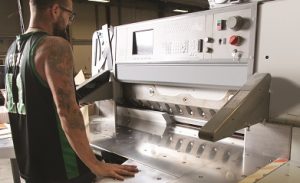 Trimming is done using a commercial guillotine. A large industrial machine that can cut through stacks of about 1000 sheets of paper.
Important for trimming are trim marks, which are used to gauge the correct cut size. However, trimming is a manual process—and never 100% accurate. Slight inaccuracies— within a small tolerance (1mm or less)—are usually not an issue. However, this is an important consideration when placing design elements close to the trim edge, as these risk being cut off.
Printing results in waste paper—such as run-up sheets from setting up the press or spoil from trimming. Waste paper is collected by the printery and sent for recycling. Very little paper from this process goes to landfill, most will be recirculated.