Die-cutting (sometimes referred to as ‘knifing’) is a non-print-based process of stamping a form or shape out of a substrate (usually paper or board). These can be packaging forms such as boxes. Or they can be design elements punched out of a flat surface. For example, a shape cut out of a brochure cover. Either way, the process is the same.
The Process
Die-cutting is undertaken after printing, using a special stamping press. A ‘die’ or knife block, mounted on the press, hits the printed sheets cutting the form. If the project is a constructed form, such as a box, the cut forms are most commonly dispatched flat (not constructed). Most box packaging is constructed as part of a product manufacturing process.
The die-cutting block begins as a vector contour drawing. This can be simple for punched shapes or very complex exploded packaging forms. The latter are commonly designed by packaging form designers—specialists in threedimensional constructs, who spend significant time prototyping and refining these forms. A specialist die-maker uses the contour drawing to make the knife block.
Considerations
When using die-cutting, there are a few considerations to be aware of;
- Complexity: When creating the contour design, keep in mind that fine detail can be challenging to implement in die-making. Fine detail can also cause tearing if the cuts are too narrow or close to the trim edge for the substrate to have any strength.
- Stock Thickness: When designing constructed forms such as packaging, be mindful of how stock thickness will affect the folding of the final form. If you are designing constructed forms, we recommend you run a computer contour-cut prototype out of the final substrate.
- Stock Suitability: Not all papers or boards are suitable for die-cutting or packaging. With packaging, there are specific considerations around the end-use that you need to be aware of. BJ Ball / Ball & Doggett offer a range of Packaging Boards specifically for this purpose. For more information, refer GSM Blog: Paper.
Die-Making
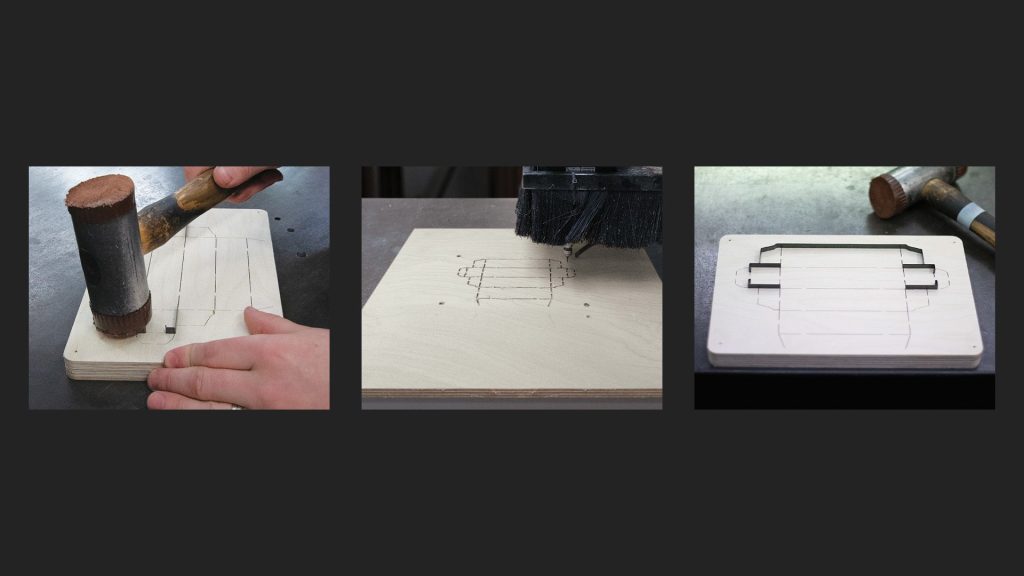 Die-making is quite the craft. The contour is channel-cut by hand, using a router or laser-cut (centre) from a base, usually plywood. These channels create a fitment for various metal knife blades. For example, cutting blades, blades with intermittent spacing for perforating, and rounded, blunt, non-cutting blades for scoring folds and creases. The operator cuts and bends the blades into shape using a bending machine. The operator then fits them into the corresponding channels on the die block using a soft head mallet (left). The photo on the right shows the partly-finished die. Die-making is a largely manual, time-consuming process
Die-Cutting Example
 This example project shows die-cutting used to create a simple Packaging Box.
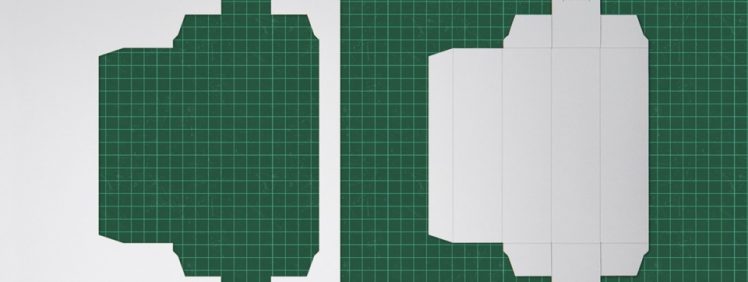
 The original contour drawing (left) uses dotted lines to represent folds and solid lines for cuts.
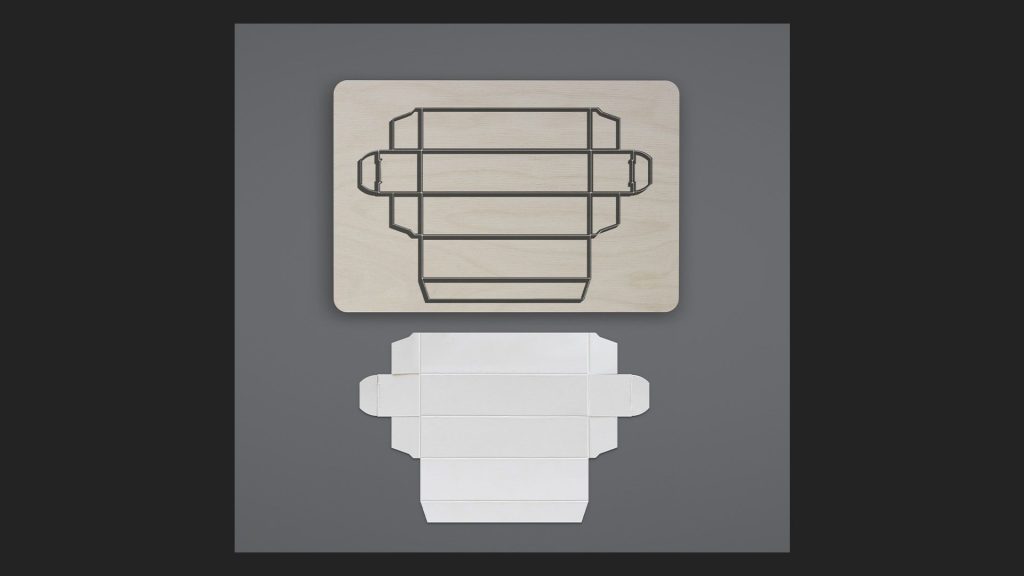
The knife blades follow the contour in the corresponding wooden die-block (top).
The final form has one glue tab— tabs are usually glued at the time the box is constructed.
Below the die-block is one of the prototype tests—cut directly from the stock using a laser cutter, the folds were added by hand, using a creasing bar. Prototypes allow the designer to accurately check the form constructs correctly before the final die-block is made.